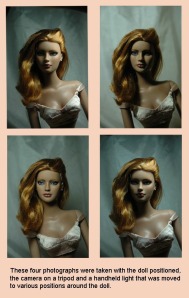
In my opinion every photographer should have a basic knowledge about studio lighting, even just lighting in general. By just a flick of a switch, lighting can change the whole mood of a photograph.
My favorite kind of lighting is natural. I enjoy shooting my models outside and positioning them according to where the sun is. Photography outdoors can be a little difficult because you can never fully be positive about what kind of weather you have to work with. Personally I kind of like the challenge, I feel like every time I figure out a away to work with the rain or to bright of a sun, I become a better photographer.
Studio Lighting
Why do we use it? Studio photography gives you complete control of your setting, you can get exactly what you want out of a subject and if you are a tremendously creative person, studio lighting becomes your best friend!
Lighting control
It is very important in studio lighting to have accessories to change the harshness of light. For example, soft light is generally generated by an umbrella or soft box attached to a light and results in shadow free images. Hard lighting, on the other hand, is generated by a small and/ or faraway light with nothing blocking the light source from the subject and results in strong shadows.
What You Need
– A good lighting space: a room with preferably no windows
– A tripod (optional)
– Paper or fabric background: generally black or white
– A willing subject: It’s no fun to take pictures of someone who doesn’t want to be there
Types of lighting
Soft: Lighting that is low or moderate in contrast, such as on an overcast day.
Hard: Lighting that creates contrast between shadowy and well-lit areas.
Side: Lighting that falls on subject from the side relative to the camera position.
Back: Lighting coming from behind the subject.
Top: Lighting that comes from above a person or object.
Related articles
- Tips To Choose Photography Lighting Kits (b2bbusinessnews.wordpress.com)
- Studio Light 101 Workshop (3 Spots Available) (ivanleungphotography.wordpress.com)
- How to Use 5 Types of Light in Photography (shutterfly.com)

